This section describes how to configure and set up different areas of the Server application and run the Web Server in order to host projects / reports and share them with clients or colleagues.
Please note that any Evo Business or Enterprise license editions are multi-user licenses that will run in the 'server mode' in order to allow users to access Omniscope installation in different capacity (editor or viewer) and control their access permissions.
Settings (Admin app)
All application settings are available from the “Admin” section of the application. Your licence defines what kind of configurations you can edit (you will see different configuration options, depending on whether you have a single or multi-user Server edition installed).
To access this section click on the “Admin” link on the Omniscope welcome page, where the files and folders are listed.
It is very important to set admin credentials the first time you run Omniscope on your machine, to avoid any security issues - you will be prompted to create a username/password for your “admin” user.
Keep these credentials somewhere safe.
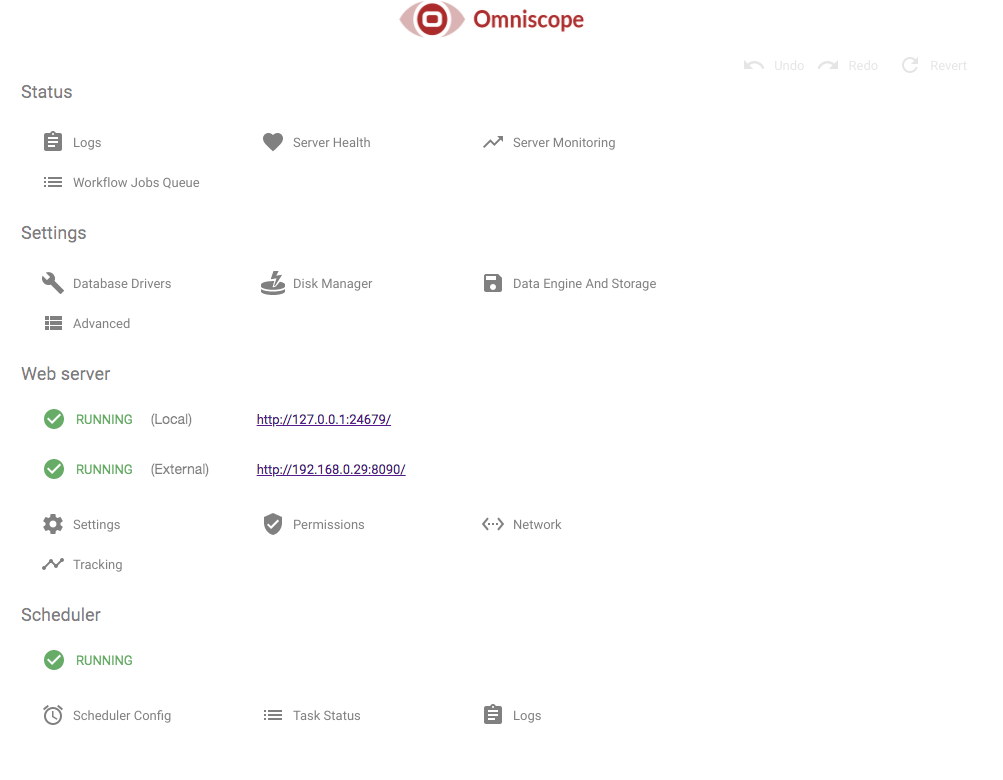
In addition to various settings configurations, the admin section allows you to access and view your server logs.
We highly recommend you to use HTTPS protocol when accessing the server settings, otherwise the data will be sent in plain text over the network and could cause security issues.
To enable “HTTPS” see the “Network” settings in the Web server section.
Web Server
The Web server mode allows you to serve up your projects and reports to any end user who can access your Omniscope address + port, constrained by the application’s network settings.
By default Omniscope only allows access from the machine itself. However, if you wish to allow access to external users, you need to go to the “Network” section in the Web server section and tick “Run Web server”. You may also want to configure concurrent workflow jobs execution if you are allowing external users to execute projects. For more information see here.
If enabled, users can access projects/files hosted on the server from any device (PC, laptop or tablet) - by navigating to the server address + port using their web browser.
The default web server HTTP port is 80.
For instance, if your local network address is 192.168.1.1 a user within the same local network can access Omniscope by navigating to http://192.168.1.1/
Network menu option on the admin page contains further information and settings.
Important: You will need to speak to your System Administrator and ensure the IP address of the server and port are accessible from the outside of your company’s firewall.
Hosting projects/files
Omniscope Web Server serves up projects and files located inside your “Sharing folder” .
The default sharing folder is called “Files” and you can find it in the omniscope-server folder, created upon installation, usually located in your user home directory
e.g. /home/myusername/omniscope-server/files
To change this location, go to Admin app -> Web Server section -> Settings and edit the Path to your desired folder. You will need to restart Omniscope to apply the changes.

You can read in this article how to schedule execution of data workflows and tasks to automate your reporting processes
Was this article helpful?
That’s Great!
Thank you for your feedback
Sorry! We couldn't be helpful
Thank you for your feedback
Feedback sent
We appreciate your effort and will try to fix the article